Showing posts with label TeamCrafts. Show all posts

Sunday, August 22, 2010

T-Shirt Refashion

Yesterday, I received a big box from Alicia stuffed full of super fun crafts to work on. I'm so excited to get going on all of them! This morning, I decided to sit down with the t-shirt refashion project she sent me.

At first, I felt completely out of my league - I've never sewn an adult sized piece of clothing, not even from a pattern! I wasn't sure I was going to have any idea what to do. But, I started sketching some ideas and then they just started tumbling in. It's so fun to run free with a project, without a "destination" in mind! With so many different ideas flying around, it felt a bit like listening to the make believe games my son and daughter play. They go something like this:

Her: Ok, pretend we're checking in to a hotel and going on vacation. Look at my pink suitcase - it has wheels!

Him: Right, ok. And then ninjas infiltrate the hotel lobby! And it's all hi-ya and whip-pew!

Her: Uh, ok. Then, me and my sister put on our pretty swimsuits and go to the pool.

Him: Yes! And we can have a race!

Her: Uh huh, or maybe we could try on clothes.

The project can take a lot of different directions, is what I'm saying.

I started out by completely forgetting to take a picture of the t-shirts Al sent me, and the pretty beads and handy organizer she packed in. Picture two brown t-shirts in a smaller and larger size.

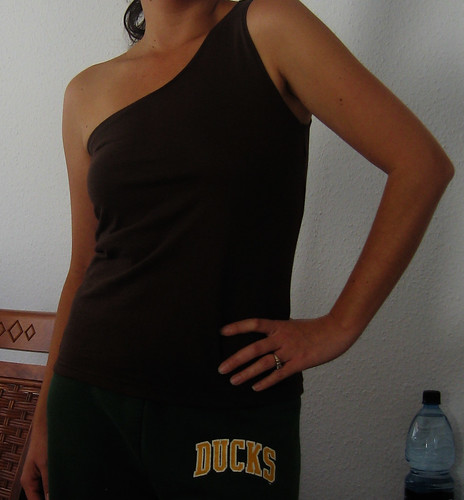
I cut the smaller t-shirt down, giving it a one shoulder shape.

t-shirt refashion


Then paired it with my sweats.

t-shirt refashion


The larger t-shirt was to be used for embellishing, but I'm just not really a ruffles and flowers kind of girl. I like clean lines and solid colors, most of the time. (In fact, Al asked me a few weeks ago what colors I like to wear the most. I said brown. She asked what do you like to pair with brown? I said, often other browns. Ha ha! I understood why she had asked when I got my two brown shirts. Also, I laughed. She definitely listened!)

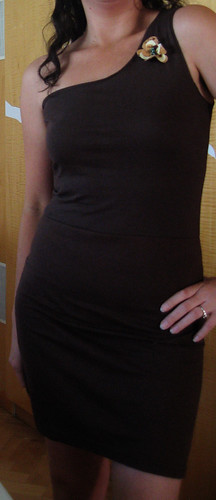
So, what to do with the larger t-shirt? While the one shoulder tank was sure comfy with my sweats, I decided it would be fun as a dress! So, I cut the shirt into a skirt.

I'm not going to go over all the steps I did because there are a dillion t-shirt refashion tutorials out there - all done by much better sewers than myself! I have no idea if I even did any of it the "right" way or not. This was definitely an exercise in trial and error - heavy emphasis on the error.

But, once I was done, this was what I had made. (I chopped my head off in the following pictures because I apparently make ridiculous faces while trying to photograph my whole self.)
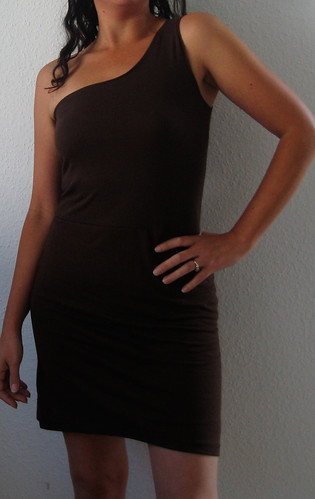
t-shirt refashion


I thought it would be fun paired with a big belt.

t-shirt refashion


But, I also did want to use some of the pretty beads Al had sent. So, I cut out a few pieces of scrap fabric I had and beaded a little seed center for the flower. Here it is up close:
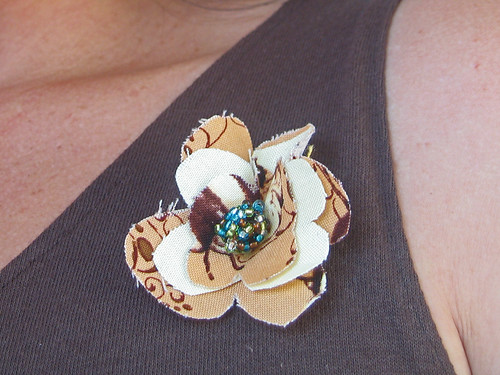
t-shirt refashion


And pinned to the dress:

t-shirt refashion


And, finally I braved the mirth of my numerous neighbors (Germany is very compact) and got a picture in true light to show you how I'll probably wear the dress most often - with one of my favorite shrugs:
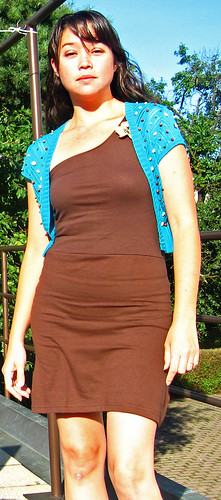
t-shirt refashion

Share/Bookmark

Sunday, August 15, 2010

More Elephants!

Jen sent me the cutest craft for this round.  I sense that she's loving elephants lately.  I can see why, these little guys are adorable.
effie & ollie by Heather Bailey


She bought fabrics from Heather Bailey's Nicey Jane line called "Wash Day Ticking-dandelion" and "Lindy Leaf-blue".  She also sent three options of felt colors for the embellishments.

I've never sewn anything from Heather Bailey's projects before, but these are great.  The directions are easy to follow, even if this was one of the more complicated sewing projects I've ever done.  I cut the pieces,
Looking like an elephant already!
and followed the piecing directions, attaching the ears to the head, the tail to the rear end, and then the most difficult part, pinned the side of the body to the underside, trunk gusset and body gusset.  Once the first side was done, these pieces held their shape better to pin to the second side.

First side sewn on, corners clipped


Second side pinned on, ready to sew!

Ready to be stuffed.
The only critique I have about this pattern is that at this point the directions tell you to go ahead and stuff ollie full of stuffing and sew him up.  The next step is to add french knots for his eyes.  I think you need to add the eyes BEFORE the stuffing goes in so that your knotted tail end of thread can be on the underside of the fabric.   Since I didn't read ahead (that's so like me with sewing projects, unfortunately) I ended up omitting his eyes.  But that's ok, because first of all, on one side the pattern of the fabric made it look like he has an eye:
See the little green eyebrow over the yellow eye?  Or am I the only weirdo out there?

And second of all, I'm using ollie as a pincushion instead of a toy, so:

At this point, I had "pink elephants on parade" stuck in my head

He kind of looks like a pink pearlized prehistoric pachyderm with those  pins on top.  Or maybe a punk pachyderm?


I love this!  I'm looking forward to sewing the second one from the blue fabric and making it effie, with the flowers behind her ears.

Share/Bookmark

Monday, August 9, 2010

Ballet Neck Little Girl's Dress

My latest "assignment" from Alicia came from a book we both own and adore called One Yard Wonders.

It's a ballet neck dress for a little girl, and it's very easy to make! Believe me, this is only the second thing I've ever sewn! My daughter (Cheeseball) and I picked out a fabric at the store that she loved and I liked. Ha ha, it's her dress, though.


My little craft store didn't have single fold bias tape on hand, so I picked up some black fabric to make my own. And @#$!%&!! that was the hardest part. After reading this account on the always awesome Making It Lovely, I decided I had better pick up the little bias tape making doodad. They only had it in the 1" size, so that's what I made. I finally discovered that doing exactly the opposite of what the doodad instructed, it sorta worked. Have any of you tried to use one of those little tools? What was your experience?

Aside from the tape, this dress was very easy, quite fun to sew and comes out adorably, I think!


Share/Bookmark

Sunday, August 1, 2010

Re-Covered Books

Jen sent me this fun and easy craft last week.  My box arrived with three hardcover books in different sizes, a selection of paper, some embellishment push pins, directions from PerfectlyImperfect and another craft (coming soon!).

I took this picture and then realized I had hard coat Mod Podge on hand, but I actually used paper Mod Podge and just didn't include it in the first photo of supplies.

The paper I used was 12x12 scrapbooking paper from one collection.  For one of the books I was able to fold and use only one sheet.  On the middle-sized book, I took one sheet of a striped pattern paper, cut it in half and covered the front and back cover about 3/4 of the way and left the spine uncovered.  Once those dried, I added a polka-dot paper in the same colors to the spine.  I think that one ended up being my favorite, even though a little sliver of the original red cover shows on the edges around the spine.


For the third book, which was the largest, I used two sheets of the same paper.  I cut one piece down and covered the back cover, then trimmed the second piece to fit, overlapping the first page on the back, and did my best to match up the stripes.  I added the embellishment to the spine on this book.  It makes a very handsome trio of books!


Be sure to check back tomorrow, Jen has a fun new printable you're going to love!


Share/Bookmark

Sunday, July 25, 2010

Coming up...

A little sneak peek of the next TeamCraft, which Al tells me has just arrived in the Pacific NW!

sneak peek at the next TeamCraft

Share/Bookmark

Monday, July 19, 2010

Days Go By

I just completed my most recent craft from Al! She had written recently about creating a perpetual calendar for herself, and she sent the ingredients off to me for my own. She did all the heavy lifting for me...counting out the pages and sticking little post-it notes in where I needed to start months and leave pages blank. Much easier for me and I got to concentrate on the aesthetics, instead!

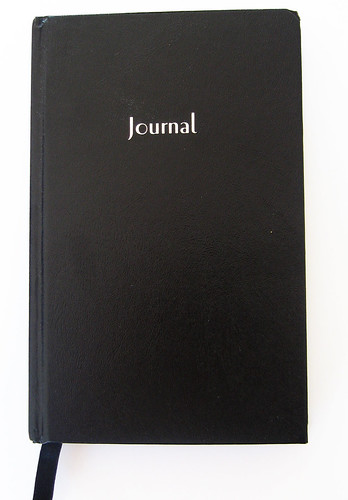
I started off with this handsome journal.

my new perpetual calendar!


I think I may go back and mod podge a decorative paper over the cover. But, I want to knock out a few other things first and make sure I've got mod podge skeelz before I take them to the calendar. It is supposed to be perpetual, after all.

Then, I designed header pages for each of the months. I started out by hand, but didn't like the direction I was taking. Rather than embellish out the page and try to steer around to the right direction, I decided to reverse course entirely and design the pages on the computer.

calendar month pageTake 1.


I used some gorgeous, graphic drop caps but ended up outside of the usage limits set by their designer and am therefore leaving those out of the pictures.

month pagesAh, that's better.


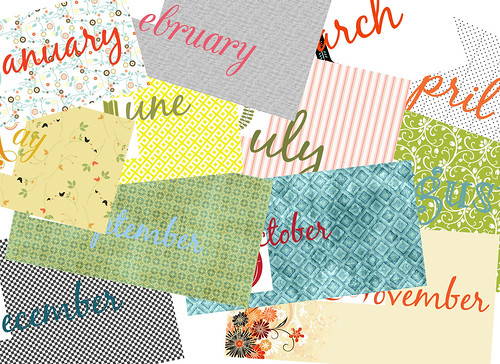
Here's a glimpse of all the months.

perpetual calendar monthly page collage


The last step was to go back through and start adding in the dates I want to remember.

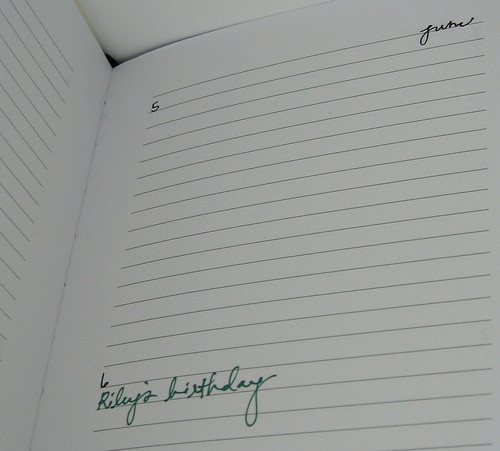
calendar pages


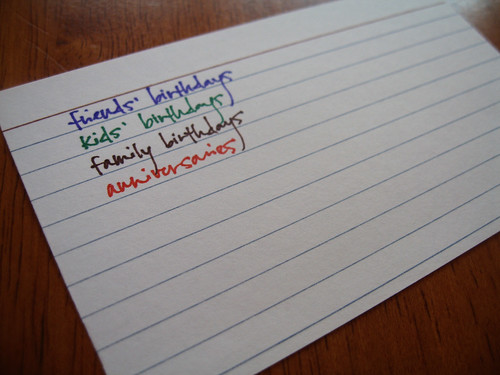
I'm color coding (because I always color code when given the opportunity). I made myself this handy little key that I tucked up front and will add to if I think of other important date categories. Any suggestions?


I'm really happy with the way this turned out! I love having this perpetual calendar and I love having an impetus to reach out and gather dates that I've wanted to know but never got around to finding out.

And now I'm heading down to the post office to get Al's next project in the mail!

Making
Share/Bookmark

Tuesday, June 22, 2010

Slow Growing Candles

Alicia sent me my latest project when I still lived in America.  Which would mean we're talking about March.  Which would mean I'm a crap craft blog partner.  But, on to the new news.

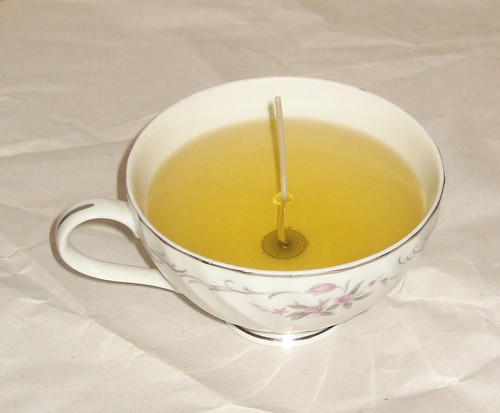
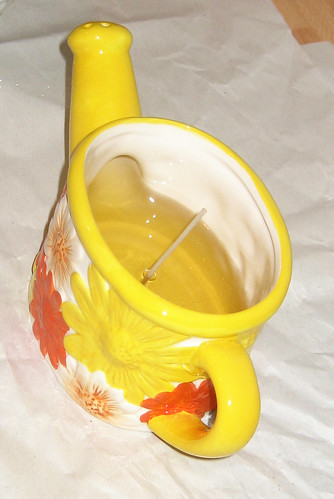
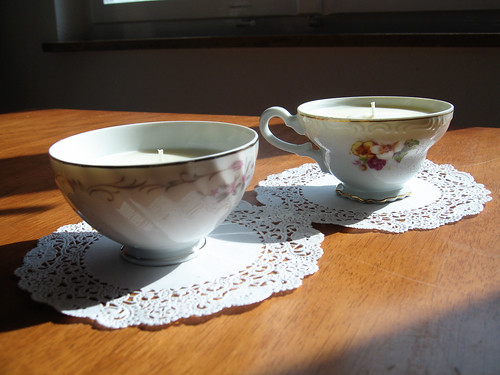
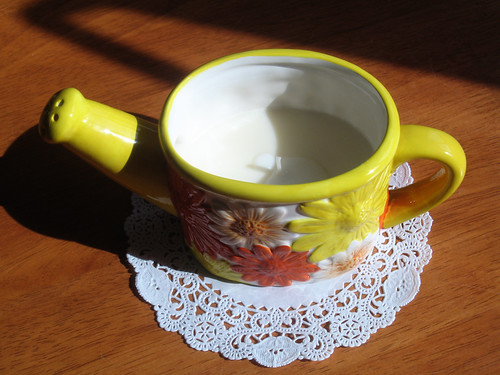
Al sent me some adorable teacups, a ceramic watering can, microwaveable soy wax, wicks, french vanilla scent and a link to design*sponge's teacup candle tutorial.  I had been eyeing this very project myself, and was stoked to have all the materials at hand and get started!

I hotglued the wicks to the candleholders. 

Team Awesome candle project


I need a new glue gun.  Mine is cute and pink but it's a little ridiculous to require a transformer to power a three inch long glue melter.

I melted the soy wax in the microwave, then allowed it to cool down to 140° to add the fragrance in.

Team Awesome candle project

Team Awesome candle project


I probably could have filled the watering can a little more, but I wasn't entirely confident the laws of physics would stay on my side and the hot wax wouldn't come bubbling out of the pouring spout.

All in all, this was a fun and very easy project and I'm thrilled with my three new candles! I almost always have a candle going in the kitchen and often one in the living room, as well. I'm looking forward to coming up with new vessels and scents and burning the midnight oil. Heh heh.

Team Awesome candle project

Team Awesome candle project


Look forward to a new Team Awesome Photo tomorrow!
Share/Bookmark

Sunday, March 7, 2010

Butterflies and Birds in Golden Cages!

Jen sent me this fun little craft a few weeks back.  I got a box full of paper, pastel brads, a hole punch and paper lids along with the directions and some other goodies.  The directions were printed from the Brides Cafe's post on DIY Bird Cage Lanterns.  I knew I'd need to pick up some string, so it sat for a few days before I tried it out.

When I went to Michael's to pick up string, I found some cute and inexpensive birds and butterflies and went ahead and picked them up to put in the cages.  I intend to hang these from the ceiling in my daughter's room around some paper globe lanterns that are already hanging.  So I did another tweak from the directions, which was to cover the entire bottom of the cage with paper also, since we'd be able to see the bottom. (I'm not sure why this wasn't done in the original anyway, since the directions call for ice cream pint lids?)

The first day I sat down to do this craft I realized the double sided tape was not working for me and I really needed to use some plain white glue, which I didn't have, and I still worked on it and just ended up frustrating myself.  I finally put it away and went back to this craft after I bought regular glue, and it was so much easier.  My dad used to say, "Any job is easy with the right tools" and I am pretty sure he's right.

So here's how the birdcages (and butterfly cages) came out:


I think they're just adorable!  So here are the tweaks that I made:
-I didn't use paper bird cutouts and went with cheap bird and butterflies from the craft store instead.
-I covered the entire bottom of the cages with paper so they would look pretty from underneath.
-I used the hole punch and punched holes in the lids and connected the "bars" of the cage with brads, too.  I think it looks cuter that way, and it feels way sturdier.  (I only figured that out on the last two.) It's also important to punch holes in the lid before you cover it with paper.  Then as you cover the lid, mark the holes on the outside before you fold the paper in.  Once you fold the paper in, you can push the brads through.  Trying to punch through the extra paper and the lid was super difficult.
-I used glue (and brads) instead of double-sided tape.

My daughter really thought these were cool. And I liked this craft a whole lot, too.


After these crafts were done a few days, the cages held together with double sided tape started to fall, but the cages with the brads are still sitting up tall just like they should.


Share/Bookmark

Friday, February 26, 2010

Ribbons and bows and sparklies, oh my!

We live.  Just busy.  But, I have a feeling the floodgates are about to open up!

Alicia sent me the cutest craft and I had SO much fun with it.  Even better, my daughter scored. It all started off with these instructions (which I thought were pretty spanking awesome):


I set up all the goodies Al sent me:


I knocked out approximately three hairbows and then my glue gun crapped out.  Which sounds like a setback, but actually I was totally stoked at the chance to run down to Michaels and pick up the super cute pink glue gun I wanted anyway.

I got back, fired up the cuteness and had SO much fun.  My daughter got involved, picking out the ribbons she wanted and the "flair" she wanted added to each pin.  Then, she refused to leave my side, intent on averting any accidental mixup of the 12839387423293 hairbows she had picked out for herself with the 5 or so hairbows she had assigned to various friends.

Here's the finished haul:


One of them apparently tipped over and somehow I didn't notice that despite shooting about a dillion pictures of the lot.

Some of them came out really well:


Others of them didn't quite work out the way I had hoped:


I had a blast and my daughter cleaned. up.  All around WIN!

I sent Al's next craft off to her last week, so look for that next...
Share/Bookmark

Tuesday, January 12, 2010

It’s been a looooooong time coming…

You may remember that Alicia sent me two crafts in her first dispatch. I’ve been working on craft #2 for, uh…let’s not go there. Between training my replacement at work, prepping the house for sale and general extracurriculars and sports/household stuff/kids gotta eat/etc…, I’ve had a tough time squeezing in the fun stuff like this adorable stuffed owl kit.


Alicia suggested I let Cheeseball (my four year old little girl) help sew up the smaller owl, which was a fantastic idea! Unfortch, trying to squeeze that in to daytime hours just didn’t happen and I finally gave up and completed it myself. She’ll be the beneficiary of the two little owls, though, and that completely makes her sparkly little day.


This kit was a lot of fun and so, so easy. Alicia is one smart cookie and knows that a craft kit that includes all the materials and is designed for the skillset of a smallish child is right in my craft sweetspot.

I think I actually managed to execute just as well as a smallish child if you pretend not to notice the fact that these poor little owls are woefully understuffed. Even without the giant leftover blob of fluff, I can tell these needed more belly. Which leads into my very few tips for the project:

Sew up to the recommended opening on both owls before stuffing either.

Stuff, sew the recommended opening mostly closed, then stuff some more.
Yep, that’s it. Seriously – so, so easy, you guys!


Share/Bookmark

Vintage Brooch Magnets

Jen sent me a great little craft. I would have finished earlier, but I had to go buy a new glue gun. I know I had one. I think it's been reappointed to garage duty. I bought a pink one this time. I bet I'll always be able to find it.

Here are the supplies she sent: a package of magnets, a package of small blocks, and four future magnets.
I threatened to keep the pink brooch to wear. But I didn't. I made it into a magnet and it is now up on my fridge.

This is a brooch, complete with pin on back. You can see a glimpse of my pink glue gun in the upper right corner, and a glimpse of my pink needle nose pliers on the right edge. I always know where they are. They don't get taken to the garage.
Using the needle nose pliers and a slight twisting motion, as though I was dialing each piece, I broke off the pin on each side. I opened the pin first so I could do each side separately and wouldn't get a flying pin in the eye. I's a jeenus.
This is one of the magnets right after I've glued it all together. I went back and added a small bead of glue all the way around to add some strength and clean up the look a bit.

Ta-Da! Four pretty new magnets on my fridge!

Jen already has her second project, and I think she's finished it. I am patching some jeans for her and then I'll be able to send out project number three with it, also.

Share/Bookmark